Background
The VSS Command Line Interface (vss-cli) allows you to upgrade the virtual hardware version to 21 (vmx-21).
ESXi/ESX version | Virtual hardware version |
|---|---|
ESXi 8.0 | 21 |
ESXi 7.0 | 19 |
ESXi 6.7 | 15 |
ESXi 6.5 | 13 |
ESXi 5.5 | 10 |
ESXi 5.1 | 9 |
ESXi 5.0 | 8 |
ESXi/ESX 4.1/4.0 | 7 |
ESXi/ESX 3.5 | 4 |
When upgrading virtual hardware, consider the following points:
Upgrading a Virtual Machine to the recommended hardware version 21 (vmx-21) is the physical equivalent of swapping the drive out of one system and placing it into a new one. Its success will depend on the resiliency of the guest operating system in the face of hardware changes.
Before you upgrade the virtual hardware version of a virtual machine, create a snapshot or backup of the virtual machine in case there are issues post upgrade.
NIC configuration may be lost when upgrading from ESXi 3.5 (vmx-04) to a newer hardware version. To workaround this issue, ensure that latest version of VMware Tools is running in the virtual machine before commencing hardware version upgrade.
Source VMware
For more information about vSphere feature set available vs virtual hardware version, please refer to the following VMware KB article.
Step-by-step guide
VSS-CLI
Login to https://vss-cli.eis.utoronto.ca with your VSS Credentials
If you have already configured the CLI, please skip to step 3. Otherwise, execute:
vss-cli configure mk
List the target VM filtering by name (Optional):
vss-cli --columns moref,name,folder.path,version compute vm ls -f name=Frontend

moref    name             folder.path                version
-------  ---------------  -------------------------  ---------
vm-2183  2004T-Frontend2  VSS > Development > Dev02  vmx-13
vm-2185  2004T-Frontend3  VSS > Development > Dev03  vmx-13
Check if VMware Tools is installed and running:
vss-cli compute vm get {name-or-vm-id} tools

Version             : 2147483647
Version Status      : guestToolsUnmanaged
Running Status      : guestToolsRunning
VMware Tools is Running.
Schedule a Virtual Machine Snapshot and/or backup any data from the OS:
vss-cli --wait compute vm set {name-or-vm-id} snapshot mk --description "Before upgrading to vmx-13" --lifetime 72As soon as you get the confirmation that the snapshot has been taken successfully, proceed to power off VM
vss-cli --wait compute vm set {name-or-vm-id} state shutdownUpgrade the Virtual hardware version
vss-cli --wait compute vm set {name-or-vm-id} version vmx vmx-21Power On virtual machine:
vss-cli --wait compute vm set {name-or-vm-id} state onLogin to the OS and check everything is OK.
If there's something not working, revert to the snapshot taken:
# get snapshot id
vss-cli compute vm get {name-or-vm-id} snapshot

# revert to snapshot
vss-cli --wait compute vm set {name-or-vm-id} snapshot <snapshot-id>
Cloud Portal UI
Login into Cloud Portal.
Select the virtual machine you need to update the hardware version.
Schedule a Virtual Machine Snapshot and/or backup any data from the OS. How-to Create Virtual Machine Snapshot
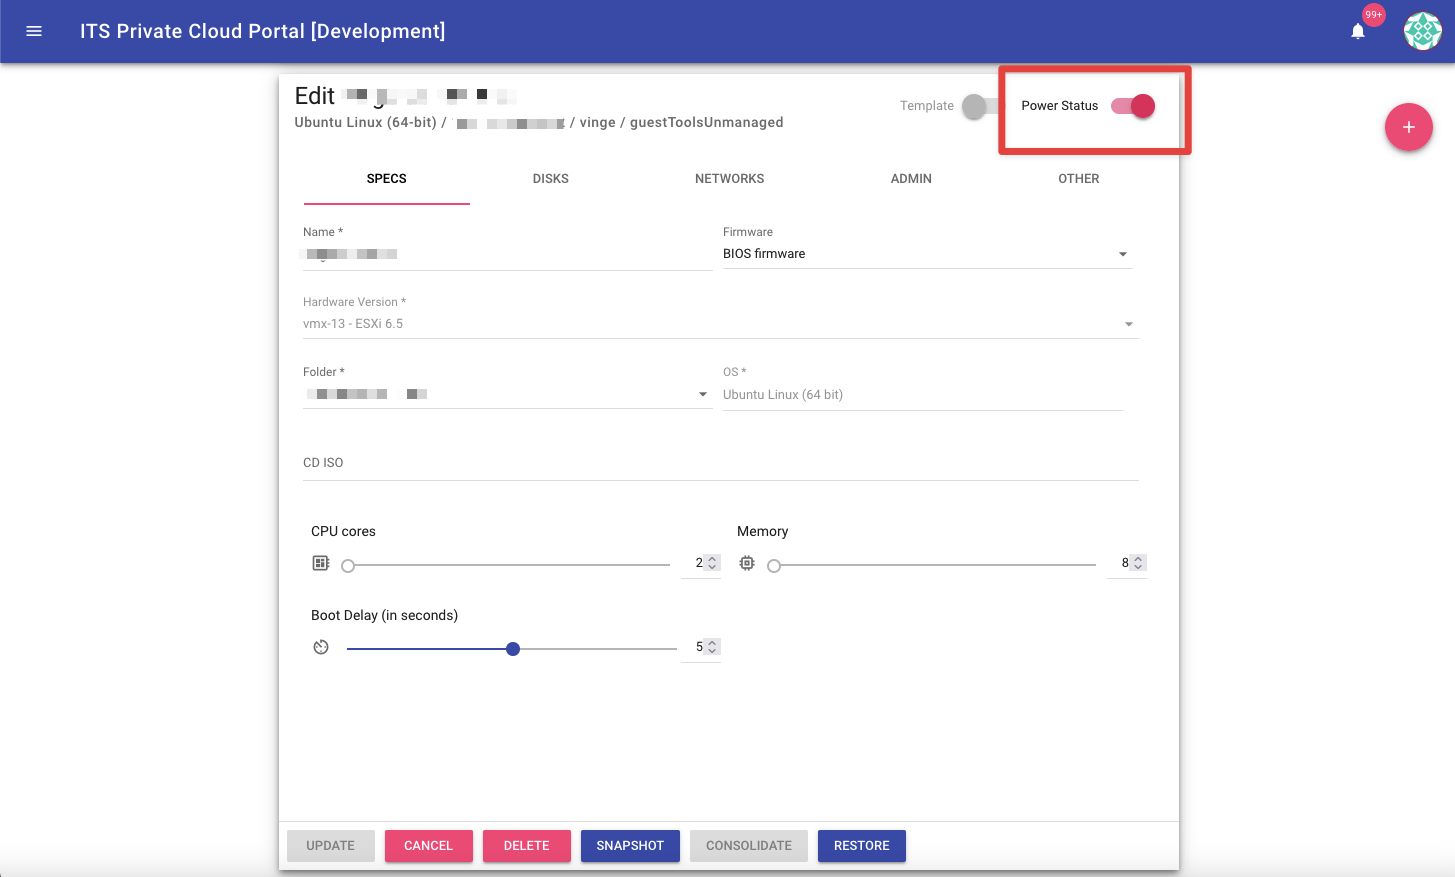
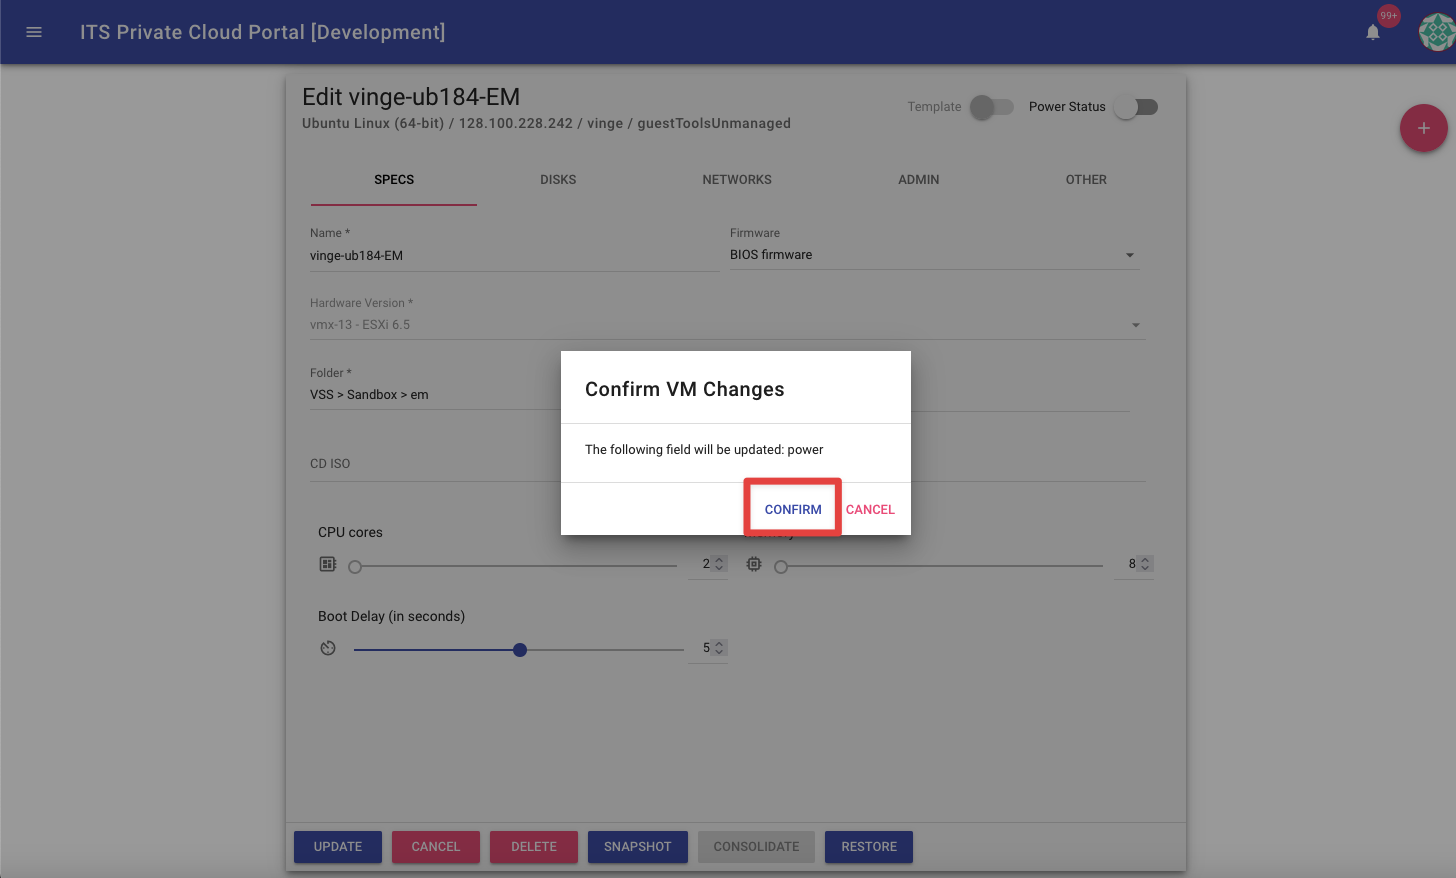
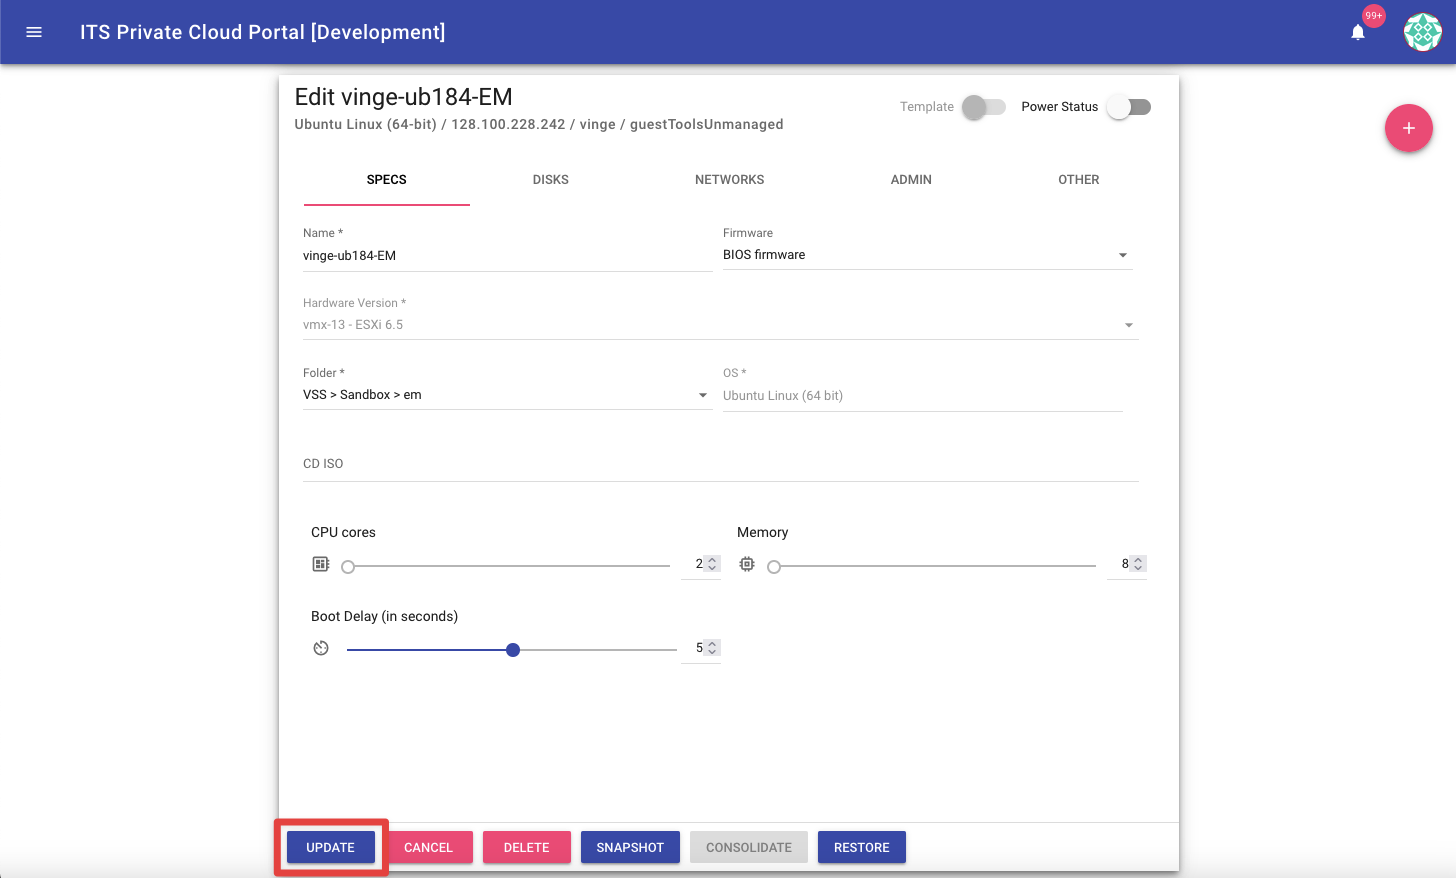
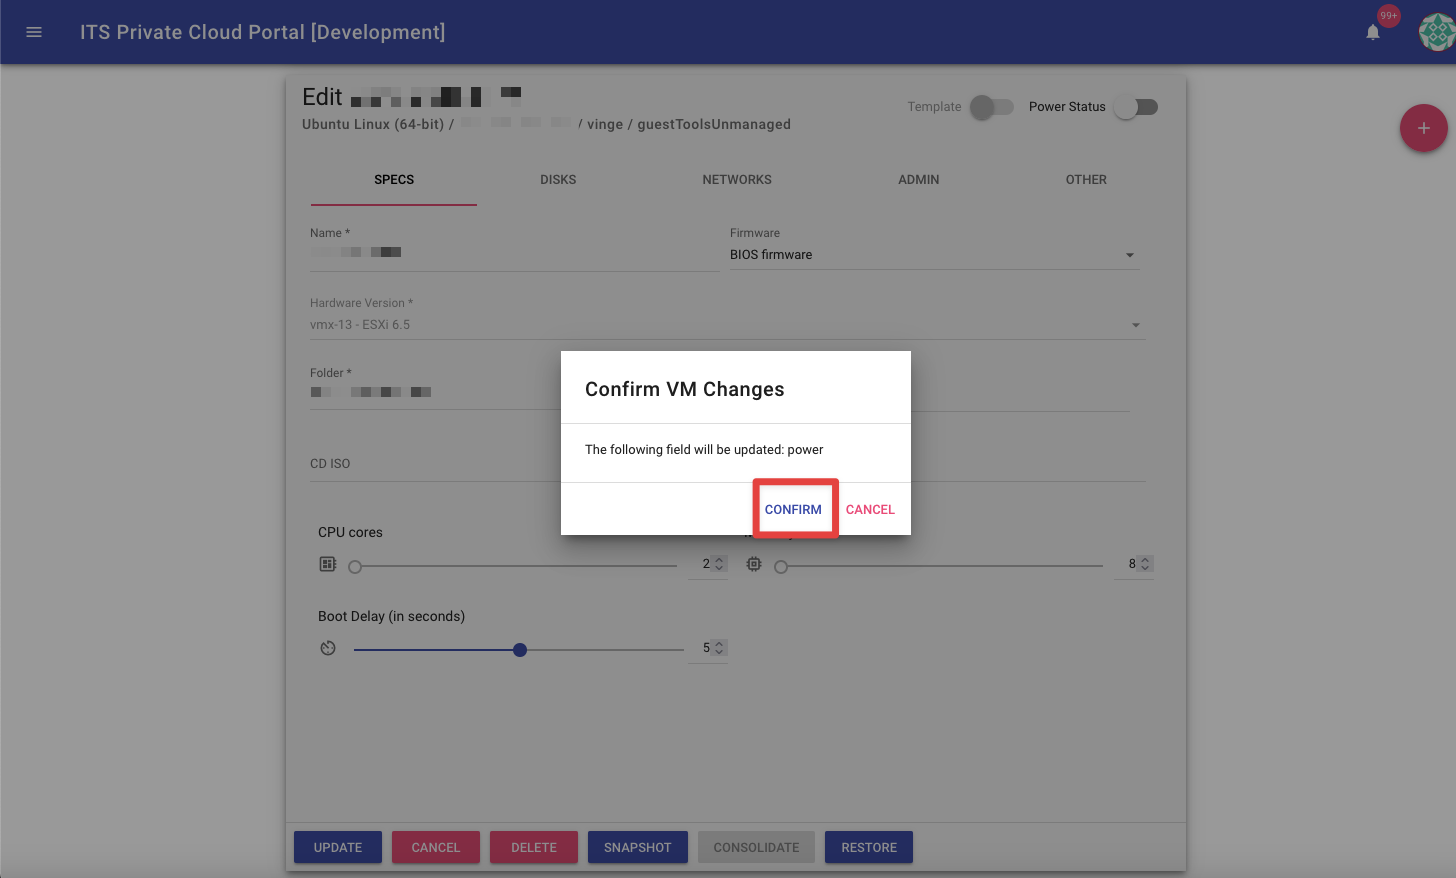
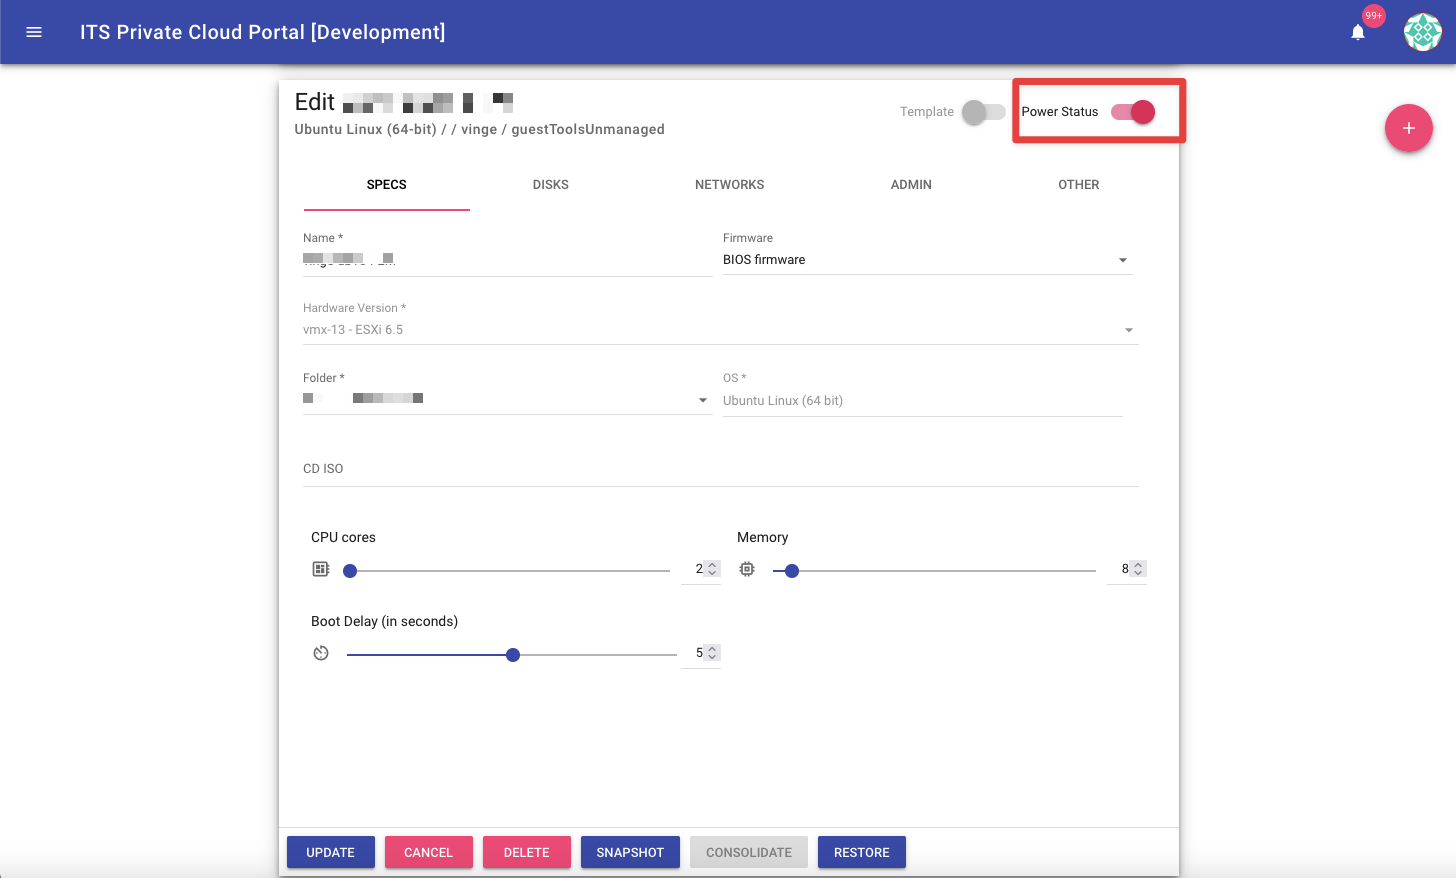
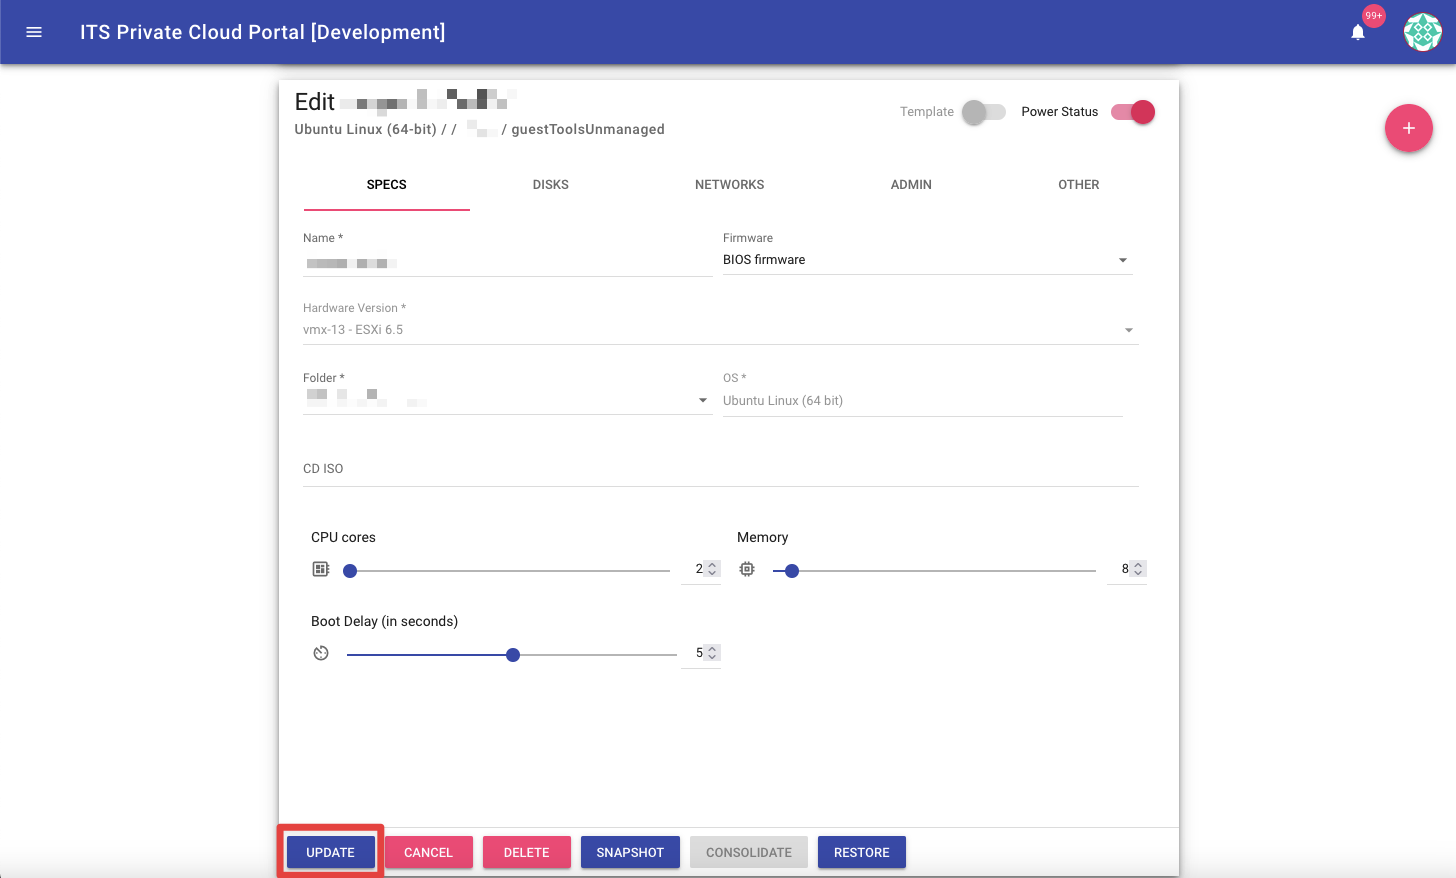
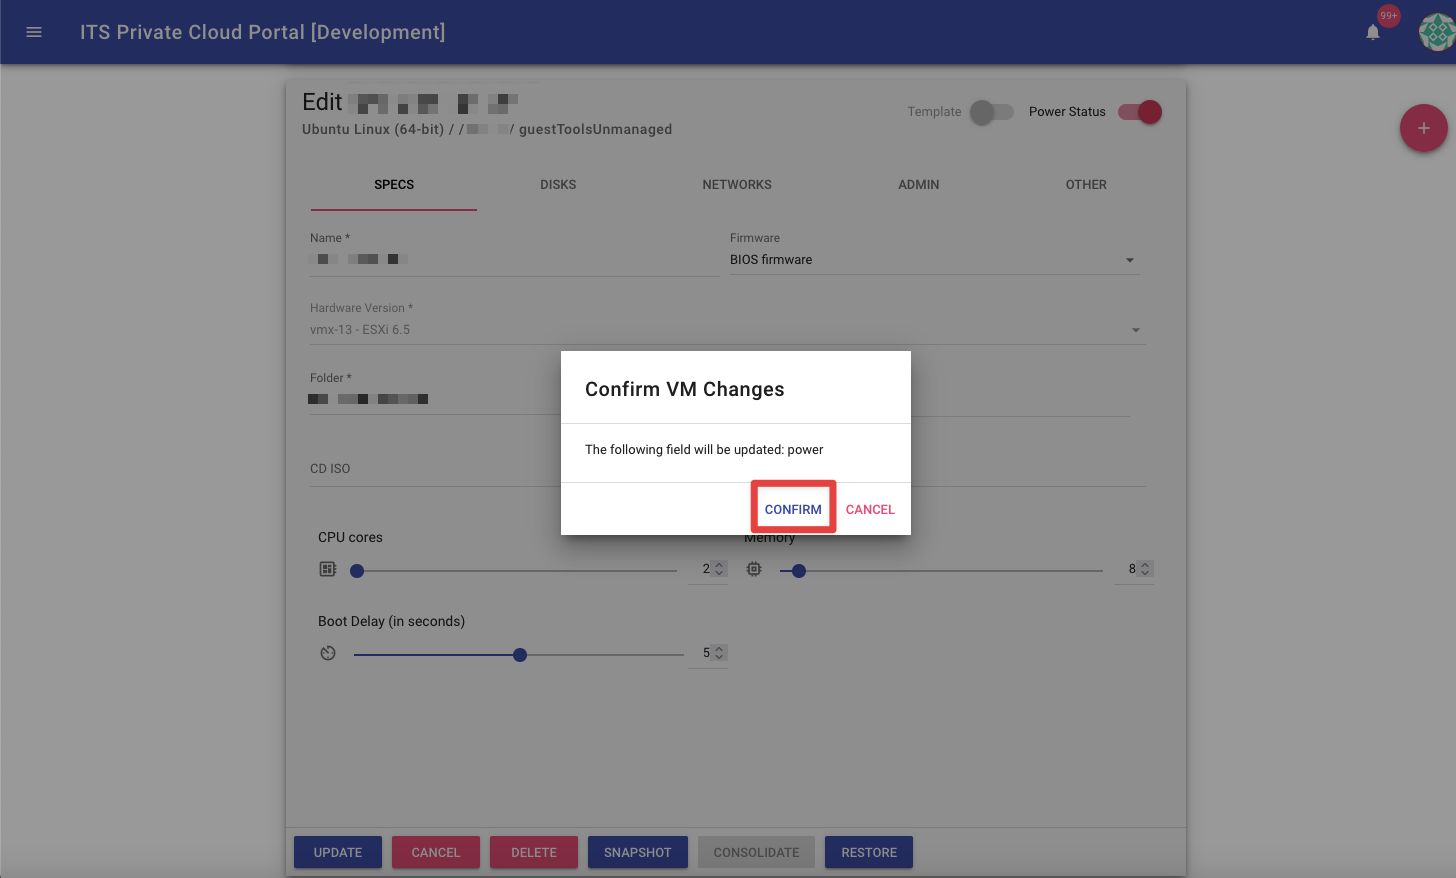
Virtual Machine hardware version update requires the power state to be Off. If the virtual machine is already powered off proceed to Step 5, otherwise toggle the Power Status, click update and confirm.

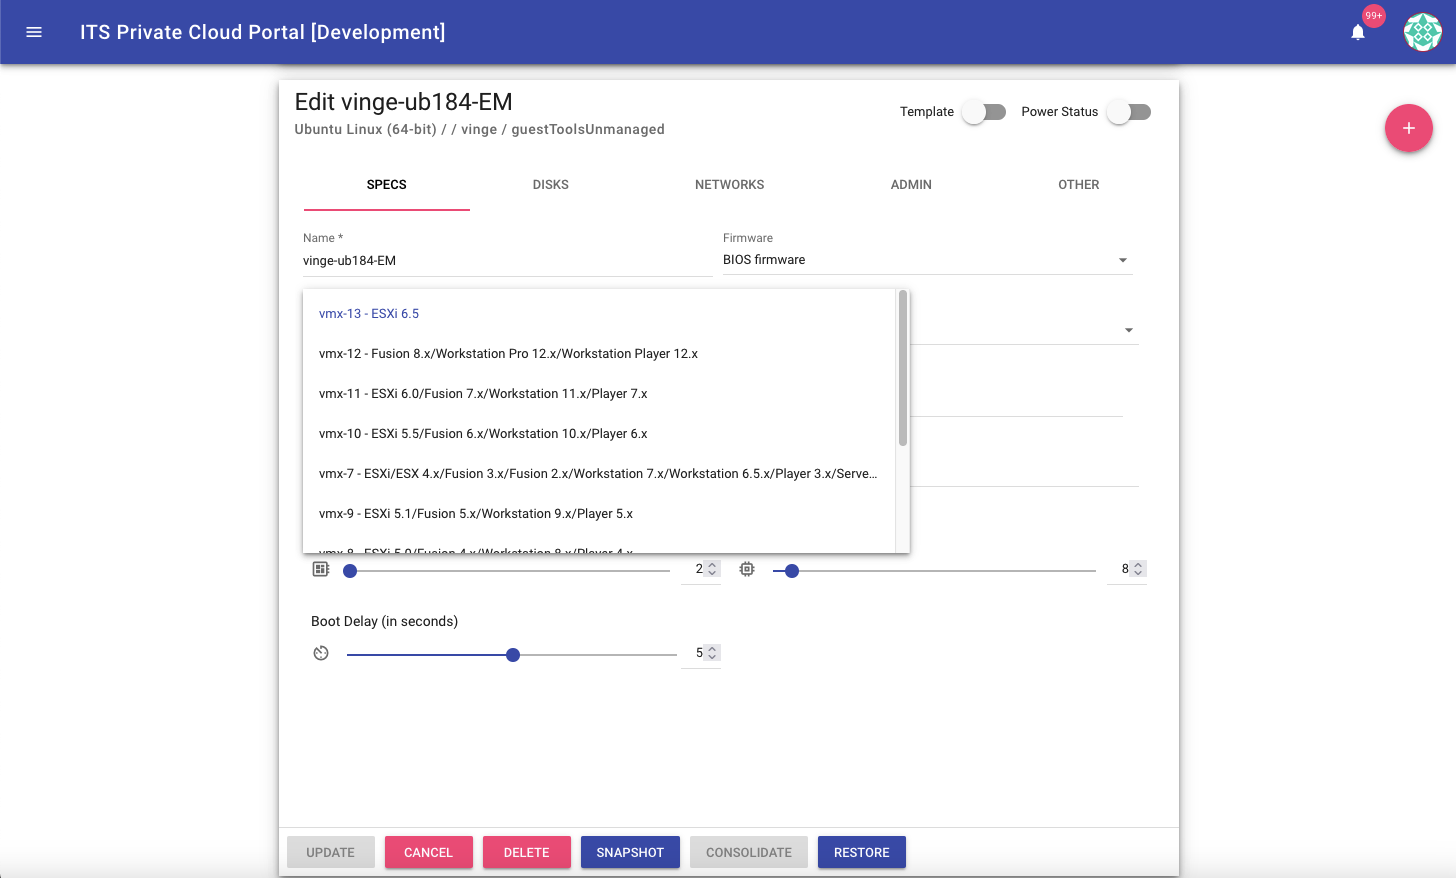
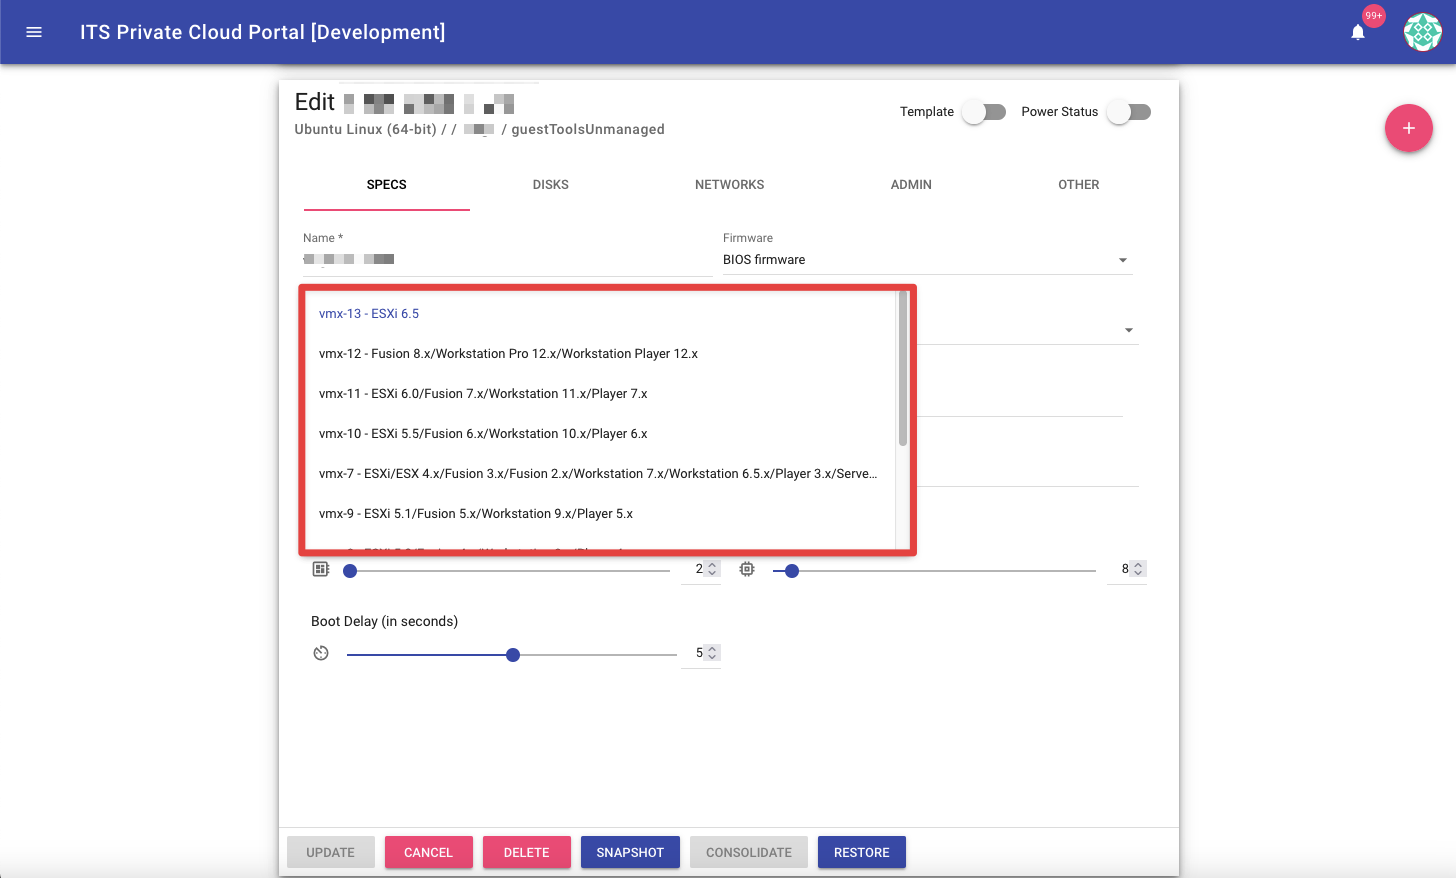
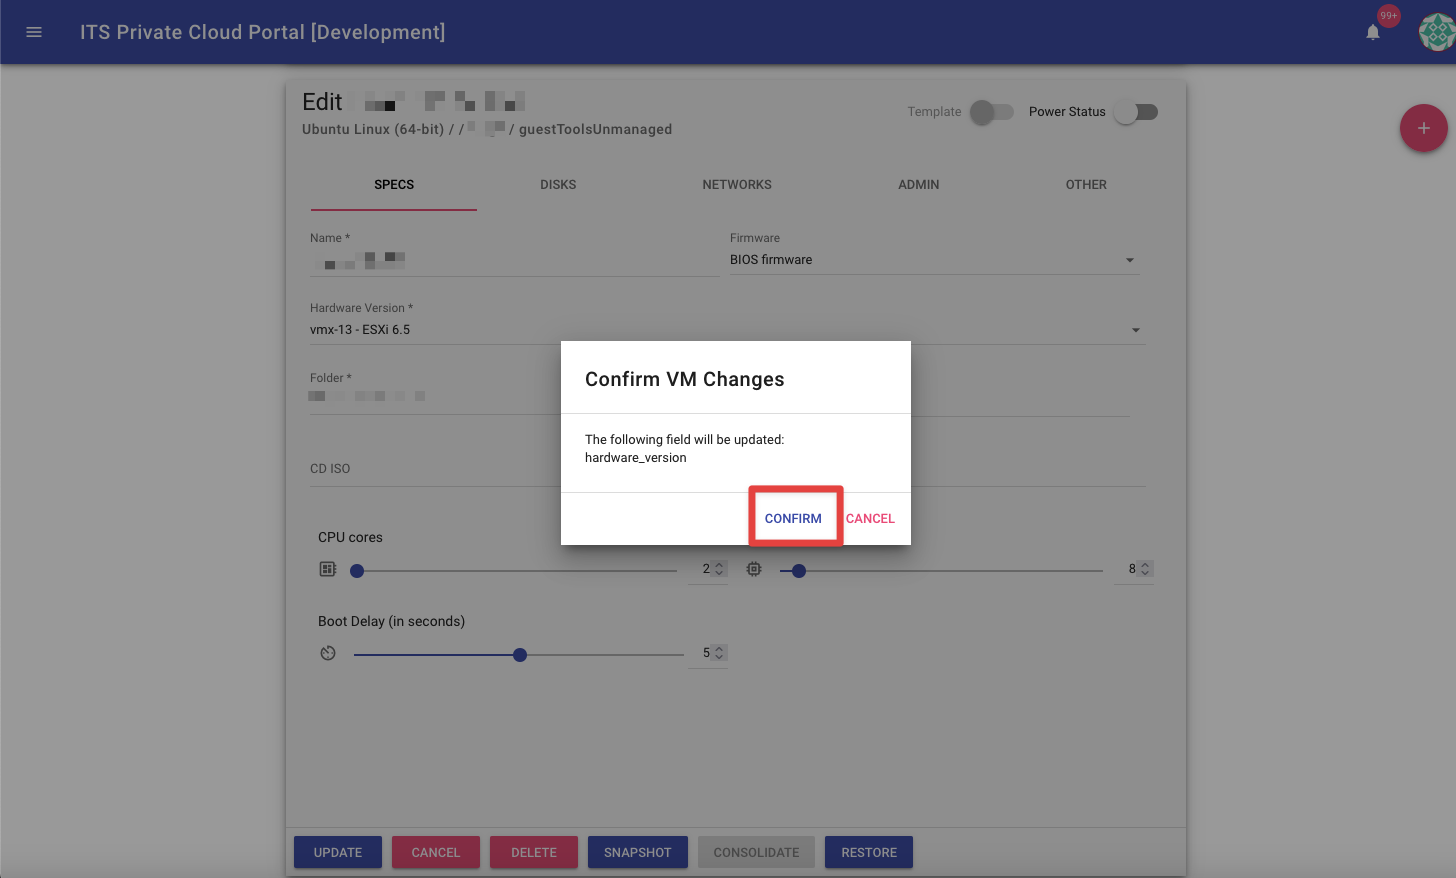
Select the virtual machine again, and proceed to upgrade the hardware version. The higher the version the newer features will be presented. Then click Update and Confirm.

Repeat Step 4 to power on the virtual machine.
Login to the OS and check everything is OK.
If there's something not working, revert to the snapshot taken in Step 3.
If you experience any trouble, please contact us.